
2022년 9월에 공개된 1.0.0 버전을 설치해봤어요
지금 대격변기여서, 공식 문서도 약간 부실한거같고, 인터넷에 질문 99%가 예전 버전들이라 힘들었어요ㅋㅋ
요약
예상 독자는 아래와 같아요
- bentoml로 모델 배포를 어찌하는지 궁금하신 분
- 1.0.x 버전의 yatai, yatai-deployment 설치 예정이신분
- 0.4.6 버전과의 차이점이 궁금하신 분
구성은 아래와 같아요.
- `yatai, yatai-deployment 란?
- yatai
- yatai-deployment
- 1.0에서 변한 것
- 테스트
- 모델 push
- 모델 배포
- 설치
- yatai:1.0.0-a0
- yatai-deployment:1.0.0-a2
- 기타
설명
1. yatai, yatai-deployment란?
bentoml도 편리하지만, yatai를 사용하면 모든 것을 ui로 관리할 수 있게되요.
1.0.x 부터는 yatai(저장소/UI)와 yatai-deployment(배포)로 분리가 되었어요.
deployment를 설치해야지 UI에서 버튼이 활성화되는 방식이에요.
1-1. yatai
> 저장소 + UI
Yatai provides two functions:
- Dashboard for all yatai components
- Bento registry
> 미리 필요한 환경들
- postgresql, minio, docker-registry, helm이 필요해요
> 설치되는 ns
- yatai-system
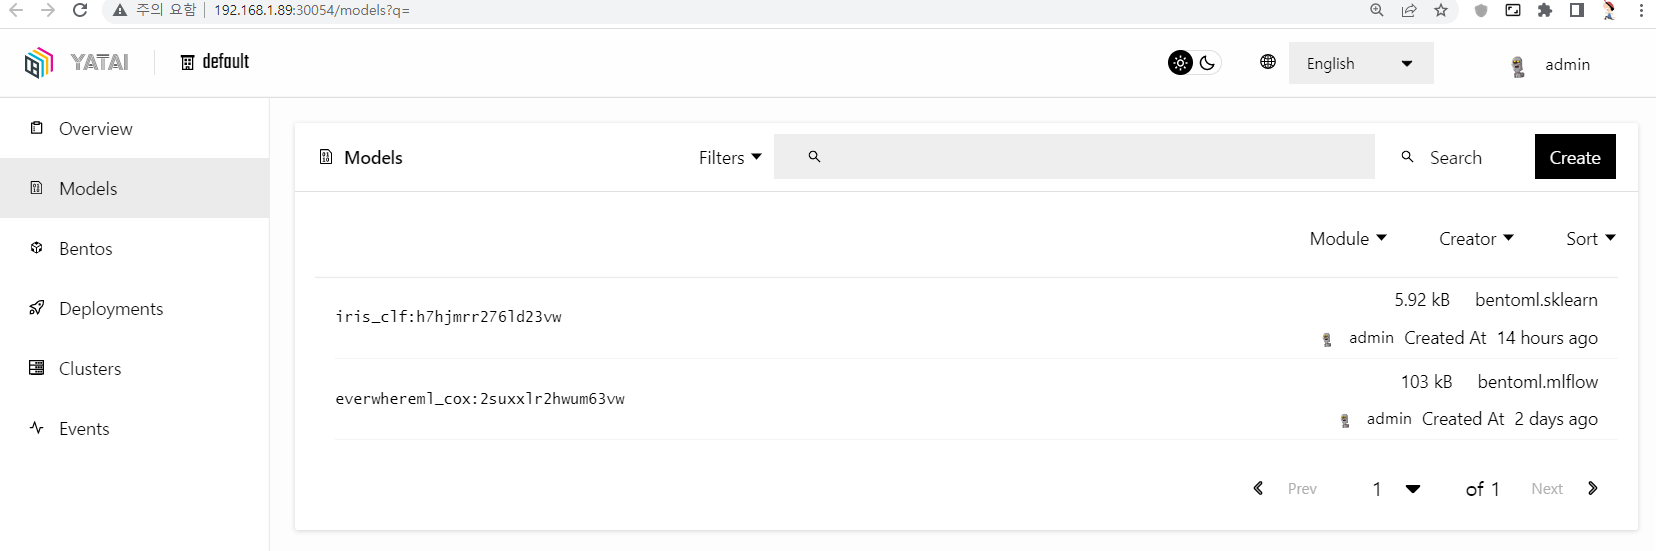
push한 model과 bento를 UI로 확인할 수 있어요
1-2. yatai-deployment
> 이미지 빌드 + 배포
yatai-deployment provides two functions:
- Build bento docker image
- Deploy bento in Kubernetes
> 설치되는 ns
- yatai-deployment: 배포용
- yatai-builder : model을 bento로 빌드?
- yatai: 배포되는 최종 API + Runner
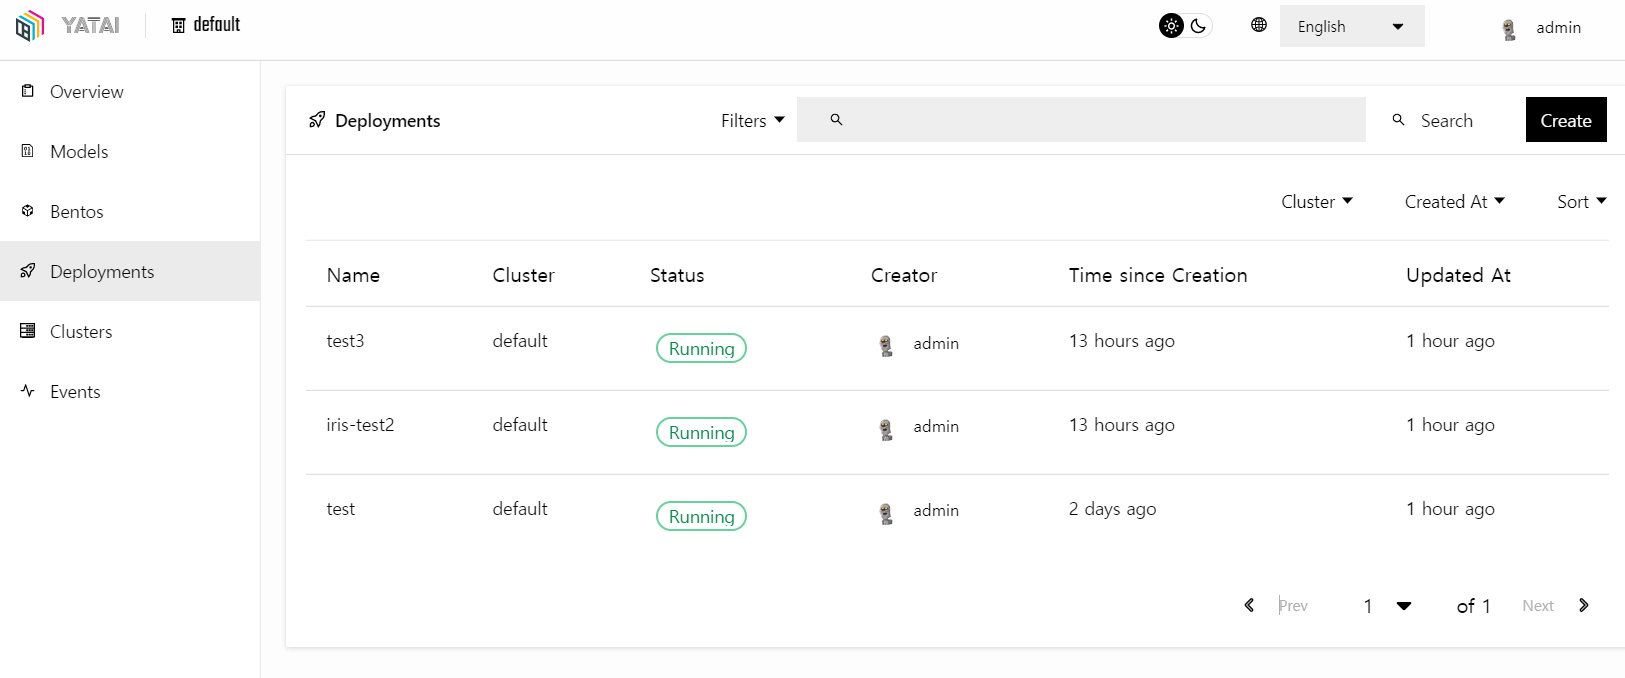
모델을 배포하고, 로그/상태 등을 볼 수 있어요
1-3. 무엇이 변했을까?
[구조가 아주 아주 단순해졌어요]
0.4.6 helm을 설치하면, 분명 나는 yatai-system만 ns로 설치했는데
yatai, yatai-components, yatai-system, yatai-builders가 설치되더라고요.
어질어질했어요. 하지만 1.0부터는 구조가 단순해졋습니다.
(대신 minio, postgres, private-repository를 알아서 설치해서 연결해야해요)
Breaking changes
- Split Yatai into two components for better modularization and separation of concerns.
- yatai: Dashboard and bento registry
- yatai-deployment: Deploy bento to Kubernetes
- Removed all Yatai component operators for more standard integration with the ecosystem.Some things will changes:
- No more integration of logging and monitoring
- Because we removed all yatai component operators, yatai now does not automatically integrate logging and monitoring. See the :ref:`Observability <observability>` documentation for observability configuration.
- In v0.4.x, yatai component operators will automatically install dependencies of the component. But in v1.0.0, we removed this feature.
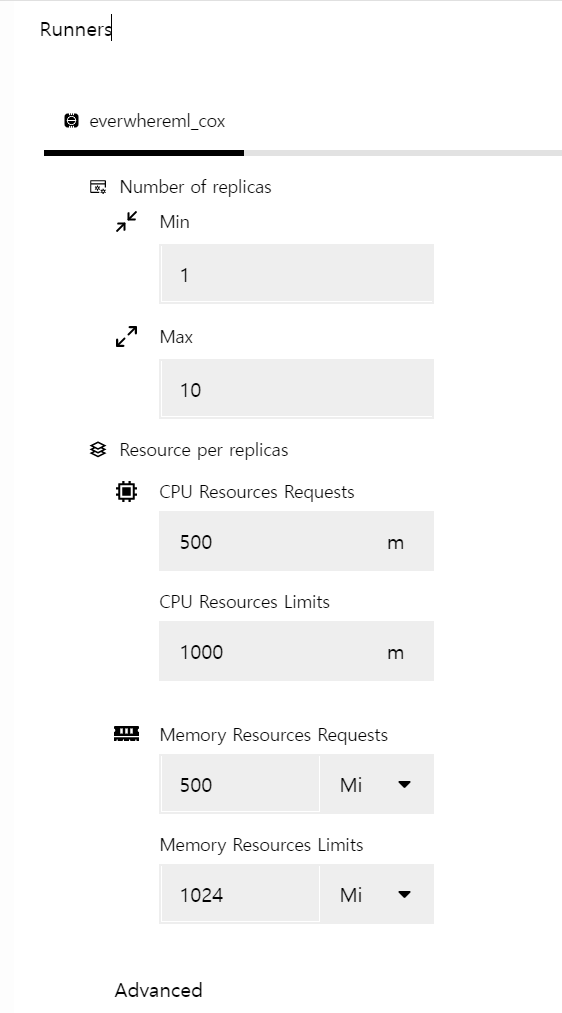
[BentoML Runner의 분리]
- A purpose built ML abstraction for running inference at scale
기존에는 code안에서 구현을 했는데, 이제는 아예 별도 POD로 실행이 되요.
- It is designed for online model serving scenarios where each stage of the serving pipeline can be demanding different types of resources, such as CPU, GPU, IO, or memory.
확장성이 높아졌고, 다른 CPU/GPU/IO/memory 요청에 대응할 수 있게 되었어요.

[표준화된 모델 저장,로딩,패키징 관리]
- Standardized packaging tools for saving, loading and managing models (and bentos)
패키징을 강화해서 모델을 저장하고 불러오는 방법을 강화했다고 해요
- new features give users flexibility so that BentoML can easily be integrated with existing CI/CD pipelines and follow DevOps best practices when deploying ML services
다른 툴들과 결합하기 좋게 업그레이드 했다고 해요.
일단은 mlflow에서 모델 관리하고, 배포할 bento만 yatai에 push 하려고요.
아래는 mlflow 의 production 모델을 load하고, bentoml 로컬에 저장한 코드에요
import os
import argparse
import subprocess
import shlex

import bentoml
import mlflow
from mlflow.tracking import MlflowClient

# get mlflow modeluri
def get_mlflow_modeluri(model_name, s3_endpoint, mlflow_endlpoint):
    os.environ['MLFLOW_S3_ENDPOINT_URL'] = s3_endpoint
    os.environ['AWS_ACCESS_KEY_ID'] = 'access-key'
    os.environ['AWS_SECRET_ACCESS_KEY'] = 'secret-key'

    client = MlflowClient(mlflow_endlpoint)
    results = client.search_model_versions(f"name='{model_name}'")
    for res in results:
        if res.current_stage == "Production":
            model_uri = res.source
            return model_uri

# save to bentoml
def import_mlflow_to_bentoml(model_name, model_uri):
    bento_model = bentoml.mlflow.import_model(
        model_name,
        model_uri=model_uri,
    )
    return bento_model

opt = {
    "model_name": "everwhereml_cox",
    "s3_endpoint": "http://192.168.1.89:300**",
    "s3_data":"s3://hgkim/sensor-data/",
    "mlflow_endlpoint":"http://192.168.1.89:300**"
}

mlflow_model_uri = get_mlflow_modeluri(
    model_name=opt["model_name"],
    s3_endpoint= opt["s3_endpoint"],
    mlflow_endlpoint=opt["mlflow_endlpoint"]
)
print(mlflow_model_uri)

bento_mdl = import_mlflow_to_bentoml( model_name=opt["model_name"], model_uri=mlflow_model_uri)
pyfunc_mdl = bentoml.mlflow.load_model(bento_mdl.tag)
pyfunc_mdl.predict()하면 모델을 사용할 수 있고
bentoml models get 하면 저장된 결과를 볼 수 있어요.


[Yatai와의 통합]
- Yatai is a new project (currently in beta) which we’ve built for users looking to scale their model deployment in production. It’s an open platform built to improve collaboration across data science and engineering while offering all the requirements to run complex ML workflows.
아직 Beta인데 이 녀석 요물이에요. 진짜 좋아요.... 로그, 이벤트 다 볼 수 있고 원하는 롤백도 만들 수 잇어요.

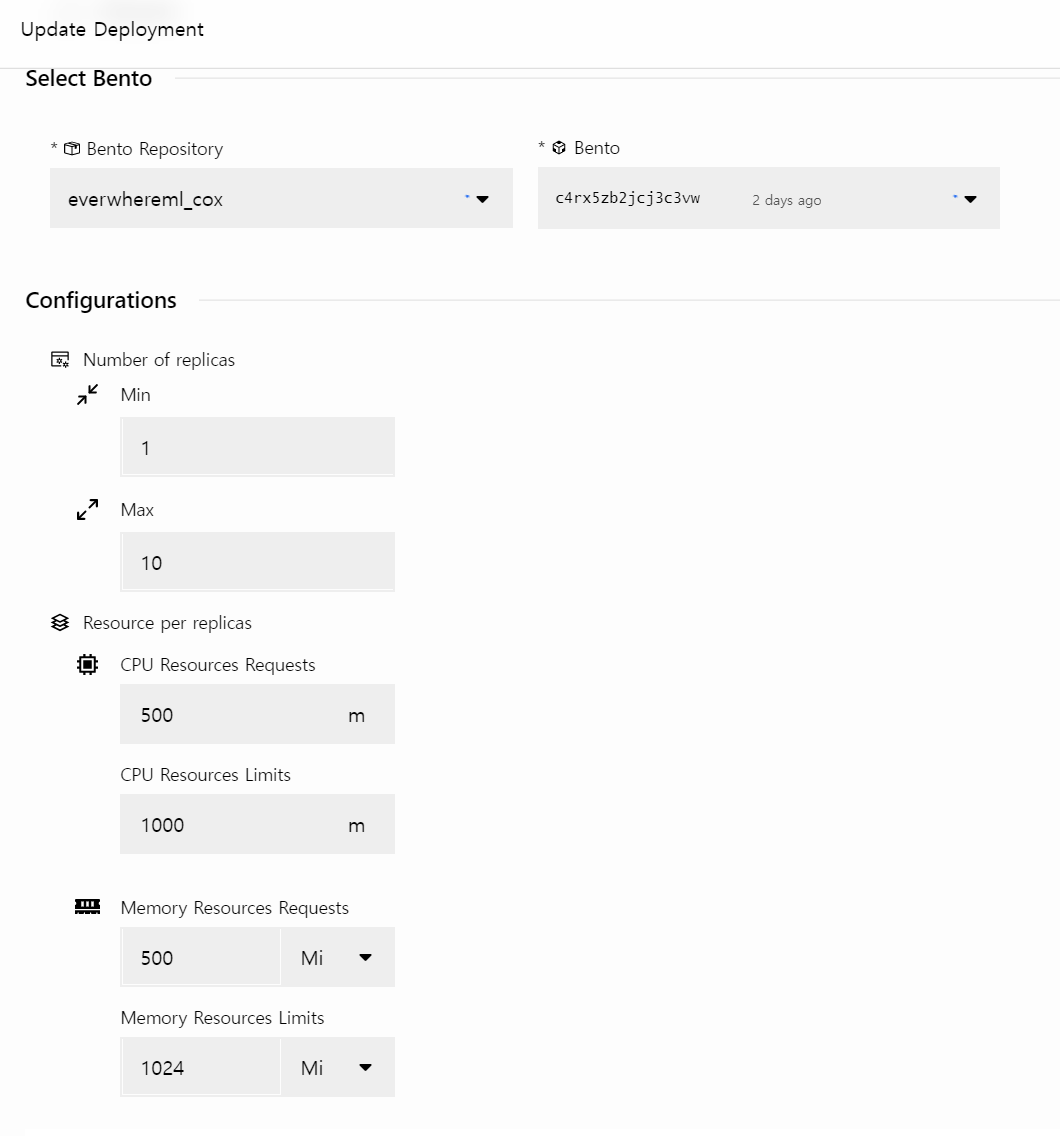
- ML engineers can easily create Kubernetes configurations that can be applied programmatically, or they can use the UI to deploy to any given cluster.
runner와 scarlette(fastapi와 비슷)이 따로 실행되는데 request/limit을 설정할 수 있어요.


더 쓰고 싶은데, 아직 소화 중이라 다음 글에서 설치 방법과 사용법에 대해서 적도록 할게요 ㅎ
https://modelserving.com/blog/introducing-bentoml-10
https://docs.bentoml.org/projects/yatai/en/latest/installation/migration.html
https://blog.kubwa.co.kr/deploy-with-bentoml-yatai-bc7ad2f374b7
'AI > MLOps' 카테고리의 다른 글
| 데이터 잡부의 MLOps도전기 (3) - 모델 배포를 위해 FaaS를 도입해보자 #Nuclio (1) | 2024.03.31 |
|---|---|
| 데이터 잡부의 MLOps도전기 (2) - 라벨링 툴로 CVAT을 선택한 이유 #VISION (0) | 2024.01.21 |
| 데이터 잡부의 MLOps도전기 (1) #이미지 불량탐지 (6) | 2024.01.07 |
| Mlflow) python, airflow로 테스트해보기 (0) | 2022.06.26 |
| Kubernetes)Mlflow설치 (0) | 2022.02.21 |